One Knob, One Job, Zero Compromise: The MXR M133 Micro Amp and the Art of the Clean Boost
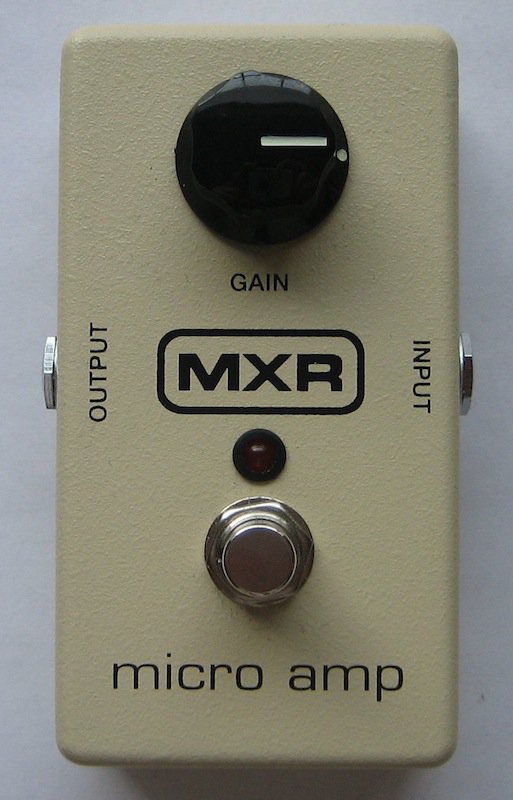
Mike Bland’s MXR M133 Micro Amp, pictured in his true-bypass modification article; whether this photograph was taken before or after the modification is unspecified. Photo: Mike Bland, CC BY 4.0.
The MXR M133 Micro Amp delivers up to +26dB of transparent boost. Gear guide covering specs, famous players, tone recipes, and buying advice.
In a world of multi-mode pedals, tone-shaping stacks, and digital signal processors with touchscreen menus, the MXR M133 Micro Amp is a radical act of simplicity. One knob. One switch. One purpose. You turn it on and your guitar gets louder — cleaner, fatter, and more present — without a hint of grit added to the signal. You turn it off and you’re back where you started. There is no mystery here, no hidden feature buried in a manual, no firmware update. Just a boost pedal that has been sitting on professional pedalboards since the mid-1970s, quietly doing the thing that most players eventually realize they need: making their guitar louder when it counts.
What looks like the simplest pedal in any rig is often the most important one. The MXR Micro Amp doesn’t change your tone. It doesn’t sculpt, color, or reimagine your signal. It amplifies it — with enough headroom to push your amp into the sweet zone, enough transparency to preserve your pickup character, and enough range (+26dB maximum gain) to compensate for whatever signal losses your cable runs, wah pedal, and effects chain have inflicted on your dry signal. It’s not glamorous. It’s essential.
History: Born from the Distortion+
The MXR Micro Amp traces its lineage to the very first wave of MXR stomp boxes. The company, founded in Rochester, New York in the early 1970s by Keith Barr and Terry Sherwood, launched what they called the Reference Series — a collection of precision-engineered, no-frills effects that covered the basics without compromise. Phase 90. Distortion+. Dyna Comp. And the Micro Amp, introduced alongside them in the early Reference Series run that defined MXR’s identity from roughly 1973 through the late 1970s.
The circuit itself is significant: the M133 is essentially an un-distorted redesign of the M-104 Distortion+. The Distortion+ uses an op-amp gain stage followed by a germanium diode clipping section that introduces harmonic saturation. Strip away the clipping diodes and optimize the op-amp stage for transparency rather than drive, and you get the Micro Amp — the same fundamental architecture, redirected entirely toward clean amplification. It’s a lineage that speaks to the thoughtfulness of MXR’s original engineering: the same DNA that makes the Distortion+ bark makes the Micro Amp bloom.
Like the rest of the original Reference Series, early Micro Amp units shipped without a power LED or an AC adapter connector — just a battery compartment, an input, an output, and a switch. The current M133 production model restores modern conveniences (power LED, adapter jack, compatibility with MXR power bricks) without altering the core circuit. It remains one of the most faithful continuations of a vintage design in production pedal history.
When MXR went through its turbulent period in the early 1980s — distribution struggles, corporate changes, eventual acquisition by Jim Dunlop Manufacturing — the Micro Amp survived. Dunlop recognized what players already knew: the pedal had earned its place not through marketing, but through results. It has been in continuous production, in essentially the same form, ever since.
Specifications: Everything You Need to Know
The 1MΩ input impedance is the most technically significant specification on that table. Most passive guitar pickups want to see a load of at least 500kΩ to preserve their full frequency response — particularly the high-frequency sparkle and low-end authority that make single-coil and humbucker pickups sound like themselves. At 1MΩ, the Micro Amp is extremely kind to your pickups. It loads them less than almost anything else in a typical signal chain, which is part of why players report that the Micro Amp doesn’t change their tone — it’s working hard not to.
The 470Ω output impedance is equally important on the other end. A low output impedance means the Micro Amp can drive long cable runs, multiple pedal inputs, and amp input stages without the signal degrading. This is why the pedal functions so effectively at the end of a long chain: it’s acting as both a gain stage and a low-impedance output driver, essentially re-buffering the signal before it hits the amp.
What It Actually Does
A clean boost pedal does one thing: it amplifies your guitar signal without deliberately adding harmonic distortion or frequency shaping. The Micro Amp’s Gain knob at minimum position still adds approximately +0.5dB — effectively unity gain with minor compensation for insertion loss. From there, turning clockwise increases output level linearly up to +26dB maximum. At noon, you’re adding roughly +13dB — enough to push most amp input stages well into their natural breakup zone. At maximum, you’re driving the front end of a 50-watt Marshall so hard it will scream, even at bedroom volume levels.
This is where clean boost becomes contextual. Into a pristine, high-headroom clean amp — a Fender Twin Reverb, a Roland JC-120, a modern hi-fi boutique amp — the Micro Amp at high Gain settings will stay clean right up to very high levels. The amp’s clean headroom determines when distortion arrives. Into a vintage single-channel amp set at the edge of breakup — a Fender Tweed Deluxe, a 1959 Marshall Plexi, a Vox AC30 — the Micro Amp doesn’t add distortion itself; it drives the amp’s own preamp tubes and output stage harder, making the amp itself distort. The saturation you get is 100% the amp’s character, not the pedal’s. This is why clean boost is sometimes the most important pedal on a traditional player’s board: it accesses amp overdrive without changing the amp’s voice.
The Fender Deluxe Reverb is the canonical Micro Amp companion. Set the amp clean. Position the Micro Amp at the end of the chain, or directly before the amp input. Kick it on for a solo. The amp’s own 22 watts of power amp saturation, its 12AX7 preamp tubes, its output transformer — all respond to the increased level exactly as they would if you simply played harder, because that’s essentially what the pedal is doing. You’re feeding the amp more signal, and the amp translates that into tone.
Famous Players
John Frusciante — Red Hot Chili Peppers
The most thoroughly documented famous player in the MXR M133’s history is John Frusciante, whose pedalboard during the Red Hot Chili Peppers’ By the Way and Stadium Arcadium eras has been studied with near-academic intensity. A Guitar Player magazine pedalboard photo from the Stadium Arcadium period (November 2006) shows the MXR Micro Amp positioned in the bottom row of his board, adjacent to his EHX Big Muff Pi — two pedals that sit at opposite extremes of the gain spectrum. Ground Guitar’s comprehensive documentation of Frusciante’s effects confirms he used the Micro Amp continuously from the By the Way tour (2003–2004) through Stadium Arcadium and his eventual departure from the band.
Frusciante‘s exact use of the Micro Amp has never been the subject of a detailed interview — he has discussed his Stratocasters, his Big Muff, his Boss CE-1 chorus, and his Ibanez WH-10 wah at length, but the boost has remained undiscussed. Ground Guitar speculates, reasonably, that the Micro Amp functions as a clean signal level boost — pushing the front end of his Marshall JCM800 or Soldano SLO-100 slightly harder for solos or specific passages where his Fender Stratocaster‘s single-coil output needs additional drive character. The sonic evidence is audible on tracks like “Can’t Stop,” where the guitar tone rides the edge of clean breakup with an urgency that a clean amp without any push rarely achieves. His solo performances within RHCP concerts document a similar character: clean but pressurized, right at the threshold of saturation without crossing into obvious overdrive territory. That’s the Micro Amp’s sweet spot applied exactly right.
Albert Hammond Jr. — The Strokes
Albert Hammond Jr., rhythm guitarist for The Strokes, represents one of the most compelling early-career Micro Amp stories in rock music. During the recording of Is This It (2001) and Room on Fire (2003), Hammond Jr.’s pedalboard was famously minimal: a Visual Sound Jekyll & Hyde dual overdrive/distortion pedal and an MXR Micro Amp. That was it. Two pedals for an entire album’s worth of New York garage rock that influenced a generation of guitar players.

The role was specific and conscious: the Micro Amp served as a clean boost for lead passages and guitar solos, driving the Fender Twin Reverb at the front end to produce the amp’s characteristic crunch at moderate volume. The approach — giant clean-headroom amp, clean boost to push it over the edge for specific moments — is exactly how the Micro Amp was designed to be used, and the sound Hammond Jr. got from it became one of the defining electric guitar tones of early-2000s indie rock. He later expanded his rig considerably as The Strokes’ albums grew more sonically complex, adding delays and additional drive stages, but the Micro Amp remained in his chain as the foundational level-control tool it had always been.
Hammond Jr.’s documented use of the M133 is consistent across multiple gear sources including Mixdown magazine’s Strokes rig coverage and GuitarChalk’s Strokes amp settings documentation.
The 207-Artist Equipboard Reality
Equipboard lists 207 professional artists who use the MXR M133 Micro Amp — making it one of the most widely used single pedals on the platform. The list spans genres from indie rock and classic rock to country, metal, and jazz. This breadth of usage reflects the pedal’s fundamental character: it does nothing but amplify, which means it’s useful in any context where a guitarist needs more signal. It’s not genre-specific. It’s not stylistically limited. It’s a tool, and 207 professionals have independently arrived at the same conclusion: the Micro Amp solves a problem that exists on every pedalboard.
Tone Recipes and Settings
Classic Solo Boost — Clean Amp into Natural Breakup
Gain: 12–2 o’clock | Placement: last in chain, directly before amp input
The foundational application. Set your amp for a clean or slightly pushed tone at your rhythm level. Engage the Micro Amp for solos. The increased level drives the amp’s preamp stage harder, adding natural amp saturation and harmonic complexity without changing your underlying tone. Works best with single-channel vintage amps — Fender Deluxe Reverb, Vox AC30, vintage Marshall. The amp’s character remains completely intact; only the intensity changes.
Humbucker-to-Single-Coil Level Matching
Gain: 8–10 o’clock | Placement: after guitar, before other effects
If you play both a Gibson Les Paul (high output humbuckers) and a Fender Stratocaster (lower output single-coils) in the same set, the volume difference can be jarring. Keep the Micro Amp on the board, engaged only when you switch to the Strat. Low-to-medium Gain compensates for the output differential without pushing the amp into distortion. This is one of the pedal’s intended use cases, per Dunlop’s own product description, and it’s genuinely useful in a multi-guitar live performance context.
Chain Buffer and Signal Recovery
Gain: 7–8 o’clock | Placement: end of chain
Long pedalboard chains with multiple true-bypass pedals and significant cable runs can bleed high frequencies from your signal — a phenomenon called treble loss, caused by cable capacitance loading your pickups through a high-impedance path. At the end of the chain, the Micro Amp’s 1MΩ input impedance stops the capacitance loading from affecting pickups (since everything upstream is now loaded by other pedal inputs), and its low 470Ω output impedance drives the amp input cleanly. With Gain set just above minimum, the pedal recovers signal level lost to chain insertion losses without adding audible boost. Subtle but transformative on complex boards.
Drive Pedal Stacking — Boosting a Tube Screamer
Gain: 10 o’clock–noon | Placement: before Ibanez TS9 Tube Screamer or similar overdrive
Placing the Micro Amp before a drive pedal like the Ibanez TS9 Tube Screamer increases the signal level feeding the drive stage. Higher input to the TS9 drives its clipping section harder, producing more saturation, more sustain, and a slightly compressed character without raising your output volume significantly (the TS9’s own output level stays constant). This stacking approach produces a heavier, more saturated tone than either pedal alone, using the Micro Amp as a “pre-drive driver” rather than a solo boost.
Always-On Presence Boost
Gain: 8–9 o’clock | Placement: last in chain, always engaged
Some players leave the Micro Amp on permanently, using it to compensate for the slight insertion loss and high-frequency bleed that occurs even in a well-maintained chain. At very low Gain settings, the pedal adds approximately 3–5dB of clean boost with essentially no audible coloration — a presence enhancement that makes your guitar feel more immediate and alive in the mix. If your guitar sounds slightly distant or thin compared to your amp’s direct tone, a permanently engaged Micro Amp at low Gain often fixes it without the player being able to articulate exactly why.
Breakup Threshold — Vintage Tweed Style
Gain: 1–3 o’clock | Placement: directly into amp input, Fender-style tweed amp
Tweed-era Fender amplifiers — the Deluxe, the Bassman, the Harvard — break up at relatively low volumes because their output transformers were designed for a different era of playing dynamics. The Micro Amp at medium-high Gain settings into a tweed-type amp produces rich, harmonically saturated breakup at lower absolute volume levels, making these notoriously loud amps usable in rehearsal and studio contexts without losing the overdrive character that makes them famous. The Micro Amp doesn’t simulate this; it triggers it, by giving the amp exactly what it needs: more signal.
Wah Pedal Signal Recovery
Gain: 9–11 o’clock | Placement: after wah, before other effects
The Dunlop GCB95 Cry Baby and similar passive wah pedals introduce a signal level reduction as a side effect of their filter sweep circuit — some players report a noticeable volume drop when the wah is engaged. A Micro Amp immediately after the wah compensates for this loss, restoring signal integrity and level consistency. The result is a wah tone that stays present in the mix without requiring you to compensate with amp volume settings.

Signal Chain Placement: The Variables
The Micro Amp’s placement in a signal chain changes its function almost entirely. Before the amp, it drives the amp. Before a drive pedal, it drives the drive pedal. At the end of the chain, it compensates for chain losses. The pedal doesn’t care — it just amplifies whatever signal it receives. Understanding this context-dependency is the most important conceptual step for any player adding a boost for the first time.
Standard placement hierarchy: guitar → wah → compressor → drive pedals → modulation → delay/reverb → amp. A boost pedal can legitimately live at any point in this chain, and experienced players often own multiple boost pedals positioned at different stages for different functions. The Micro Amp most commonly occupies two positions: immediately before the amp (solo boost / amp drive), or immediately after the guitar (as a high-impedance buffer and level-setter for everything downstream).
One placement caveat: the Micro Amp’s hardwire bypass means its own impedance is NOT in the circuit when the pedal is off. This is generally desirable — you want bypass to sound exactly like a cable. However, if you’re relying on the Micro Amp’s 1MΩ input impedance as a buffer for your signal chain (some players do), that buffering disappears when the pedal is switched off. For always-on buffering, leave the Micro Amp engaged at minimum gain, or pair it with a dedicated always-on buffer elsewhere in the chain.
Comparisons with Alternative Boost Pedals
MXR M233 Micro Amp+
The M233 Micro Amp+ ($149.99 MSRP) is the direct evolution of the M133, adding two controls to the original formula: a high-frequency shelving boost and a low-frequency shelving cut/boost. This allows the M233 to function as a boost with integrated tone shaping — useful for dialing in a specific EQ character rather than pure transparent boost. Players who want more gain-stage flexibility with tonal adjustment should consider the M233; players who want genuine, unaltered signal amplification should stay with the M133. The original circuit’s simplicity is a feature, not a limitation. Having one fewer knob means one fewer variable to second-guess in the middle of a set.
Electro-Harmonix LPB-1 Linear Power Booster
The EHX LPB-1 is the other founding document of clean boost pedal design — introduced in 1968, predating the Micro Amp by several years, and similarly simple. The LPB-1 runs on 9V and offers up to approximately +35dB of boost, slightly more than the Micro Amp’s +26dB. The two pedals produce subtly different characters due to their different op-amp architectures: the LPB-1 has a slightly more pronounced midrange push, while the Micro Amp is often described as slightly fuller and more neutral. At their respective modest gain settings — 10–11 o’clock — the difference is academic. At high gain settings, it becomes more audible. The Micro Amp is generally considered the cleaner option; the LPB-1 adds more harmonic enhancement at high gain.
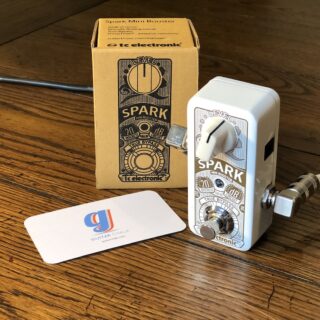
TC Electronic Spark Mini Booster
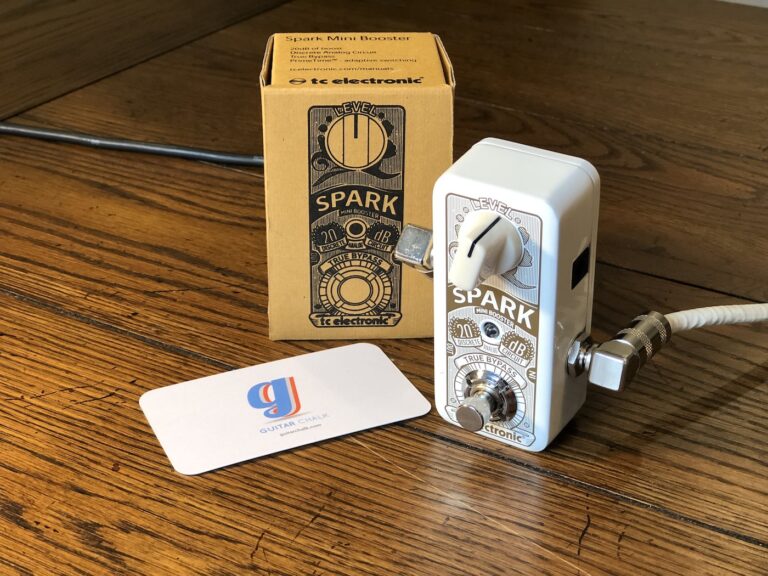
The TC Spark Mini offers up to +20dB of boost (slightly less than the Micro Amp’s +26dB) in a smaller footprint, at a lower price point (~$60 street). It features true bypass via relay. The Spark Mini is a solid, transparent boost that competes genuinely with the Micro Amp on pure function. The Micro Amp wins on maximum gain range (+26dB vs +20dB), on brand legacy, and on the psychological comfort of knowing exactly what circuit you’re dealing with. The Spark Mini wins on size and price. Neither has a wrong answer; the choice is contextual.

Xotic EP Booster
The EP Booster is deliberately NOT a transparent boost — it’s voiced to emulate the preamp circuit in the Echoplex EP-3 tape delay, which adds a warm, harmonically rich coloration to the signal. Many players love it for exactly this reason: it makes your guitar sound “better” in a subjective, subjective way that the Micro Amp intentionally avoids. The Micro Amp is the right choice when you want your amp and pickup to define the tone; the EP Booster is the right choice when you want the boost pedal itself to add character. They are solving different problems. A player who likes the EP Booster and the Micro Amp might reasonably own both.
The M133 in a Modern Pedalboard Context
Contemporary pedalboard culture has made boost pedals more visible and more discussed than at any previous point in guitar history. Players who once ran a guitar directly into a vintage amplifier now manage complex signal paths with multiple switching systems, relay bypass networks, buffered loops, and digital multi-effects. In this context, the Micro Amp’s core function has only become more relevant: more complex chains accumulate more signal degradation, more level inconsistency between pedals, and more moments where a player needs a specific, controllable level push without tonal alteration.
The MXR M102 Dyna Comp and the M133 Micro Amp represent opposite tools in the same signal management conversation: the Dyna Comp brings peaks down (compression) while the Micro Amp brings the entire signal up (boost). Used together — compressor to level the dynamic range, boost to restore overall level — they produce a consistent, present signal that hits the amp at exactly the intended level regardless of playing dynamics. Many professionals run exactly this combination as an always-on foundation, not as effects, but as signal conditioning infrastructure.
The MXR M108S Ten Band EQ serves as the Micro Amp’s closest high-feature-count MXR alternative for players who want level control with frequency shaping — the M108S includes output and input level sliders alongside its ten EQ bands. For players who need a frequency-specific presence adjustment rather than flat amplification, the M108S addresses that need. The Micro Amp remains the right tool for everyone else.
Buying Guide: New vs. Used
The MXR M133 Micro Amp is available new at approximately $79–99 USD street price, against a $105.99 MSRP. Sweetwater, Guitar Center, and authorized MXR dealers typically stock it. Used units appear regularly on Reverb in the $40–65 range for examples in excellent condition. The circuit has been stable for decades, so a used unit in good physical condition will function identically to a new one — there are no significant component variation issues to worry about, no vintage vs. modern circuit differences to navigate, and no vintage premium to pay for early units (unlike, say, a Script Logo Phase 90 or a pre-CBS Stratocaster). Buy based on price and condition.
The only ownership consideration: battery vs. adapter. The M133 will run on a single 9V battery, which is useful for grab-and-go situations, but draws at the standard 9V rate that will deplete a fresh alkaline battery within a few hours of active use. For permanent pedalboard installation, use the ECB003 adapter or any compatible 9V output from a DC Brick, Iso-Brick, or Mini Iso-Brick power supply. Unlike several other MXR pedals in this series — the M117R Flanger and M108S Ten Band EQ, both of which require 18V — the Micro Amp is standard 9V center-negative, compatible with virtually every power supply on the market.
Ownership Notes: What Players Discover
The most common revelation for first-time Micro Amp owners is realizing they need less Gain than they expected. Players who have read “up to +26dB” in the spec sheet often dial the knob close to maximum on their first try, overwhelm their amp, and then spend the next ten minutes turning it back down. The useful range for most applications lives between 9 o’clock and 1 o’clock. Maximum Gain is available for specific edge cases — driving a very clean, high-headroom amp into significant saturation, or compensating for an extremely long cable run in a stadium-scale setup. It is not a typical solo boost setting.
The second discovery: position matters more than gain level. A Micro Amp at 10 o’clock before the amp sounds different from a Micro Amp at 10 o’clock before a drive pedal, which sounds different again from a Micro Amp at 10 o’clock after a wah. Experiment with placement before adjusting the Gain knob. You may find that moving the pedal one position in your chain produces the result you were trying to achieve with five minutes of knob-twisting.
The third: once players understand clean boost, they often end up with two on the board — one as a permanent buffer/level-setter, one as a switchable solo boost. The Micro Amp’s price point makes this practical. A pair of M133s on a professional touring board represents a very modest investment relative to the signal integrity and performance flexibility they provide.
Frequently Asked Questions
Does the MXR M133 Micro Amp add any distortion?
No. The M133 is designed as a clean boost with no intentional harmonic distortion. At maximum Gain settings, some players detect a very subtle harmonic enhancement from the op-amp stage operating near its headroom ceiling, but this is negligible compared to any dedicated overdrive or distortion pedal. Any distortion you hear through the Micro Amp is coming from your amp responding to higher input level, not from the pedal itself.
Is the MXR M133 true bypass?
The M133 uses hardwire bypass — the signal path bypasses the active circuit when the pedal is off, but the switching mechanism is not a 3PDT true bypass relay. In practice, hardwire bypass on the M133 sounds essentially identical to a cable: there is no buffering of the signal in bypass mode. The distinction between “hardwire bypass” and “true bypass” matters most in complex circuit discussions; for the average player, the M133 in bypass sounds like it’s not there.
What’s the difference between the M133 and the M233 Micro Amp+?
The M233 Micro Amp+ adds a high-frequency shelving control and a low-frequency shelving control to the M133’s single Gain knob, allowing EQ shaping of the boosted signal. The M133 is flat boost only; the M233 is boost with integrated tone sculpting. Players who want transparent amplification choose the M133. Players who want to boost with a simultaneous frequency adjustment choose the M233.
Can the M133 be used as a buffer?
Yes, with a caveat. The Micro Amp’s 1MΩ input impedance and 470Ω output impedance make it an excellent buffer when engaged. However, in hardwire bypass mode, these impedance characteristics are not present in the circuit — the pedal is simply connecting input to output through a wire. For always-on buffering, keep the M133 engaged at minimum Gain (approximately +0.5dB — essentially unity), or use a dedicated buffer pedal elsewhere in the chain.
How does the M133 interact with fuzz pedals?
Fuzz pedals — particularly vintage germanium designs — are sensitive to the impedance of what feeds them. A low-impedance source (a buffered output, another active pedal’s output) can suppress or change a fuzz’s character significantly. If you run a Micro Amp before a vintage-style fuzz, you’re feeding the fuzz a low-impedance signal, which will affect its tone. The solution: place vintage fuzz pedals before the Micro Amp in the chain, so the fuzz sees your guitar’s pickup impedance directly. Place the Micro Amp after the fuzz to boost the fuzz output level without affecting its input character.
Does the M133 need a special power supply?
No. Unlike the MXR M117R Flanger or M108S Ten Band EQ, which require 18V power, the M133 operates on standard 9V center-negative DC — compatible with virtually every pedalboard power supply on the market, including the MXR DC Brick, Iso-Brick, and Mini Iso-Brick, as well as most third-party isolated and non-isolated supplies. It also accepts a 9V battery. Power requirements are the simplest of any MXR pedal in the current lineup.
Is the M133 worth buying in 2026 when more advanced options exist?
Yes, for players who need transparent clean boost. Advanced options — multifunction boost/EQ pedals, programmable preamps, transparent buffers with level control — offer more features, but more features means more variables, more settings to manage, and more opportunities for something to sound wrong. The M133’s single-knob simplicity is not a limitation of 1970s engineering that hasn’t been improved upon; it’s a deliberate design philosophy that remains current. When you need more signal and nothing else, the M133 is still the most efficient tool for the job, at a price that makes the decision obvious.
Where should I position the Micro Amp on my pedalboard?
It depends on its role. As a solo boost: last in chain, directly before the amp input. As a humbucker/single-coil level matcher: immediately after the guitar, before all other effects. As a drive pedal stacker: immediately before the drive pedal you want to push harder. As a signal chain buffer: last in chain (or wherever chain degradation is most severe). There is no universal correct position — experiment with placement before adjusting Gain, since position changes the pedal’s function more than the knob does.
Image credits
- John Frusciante: Hel Davies from United Kingdom, Wikimedia Commons, CC BY-SA 2.0.
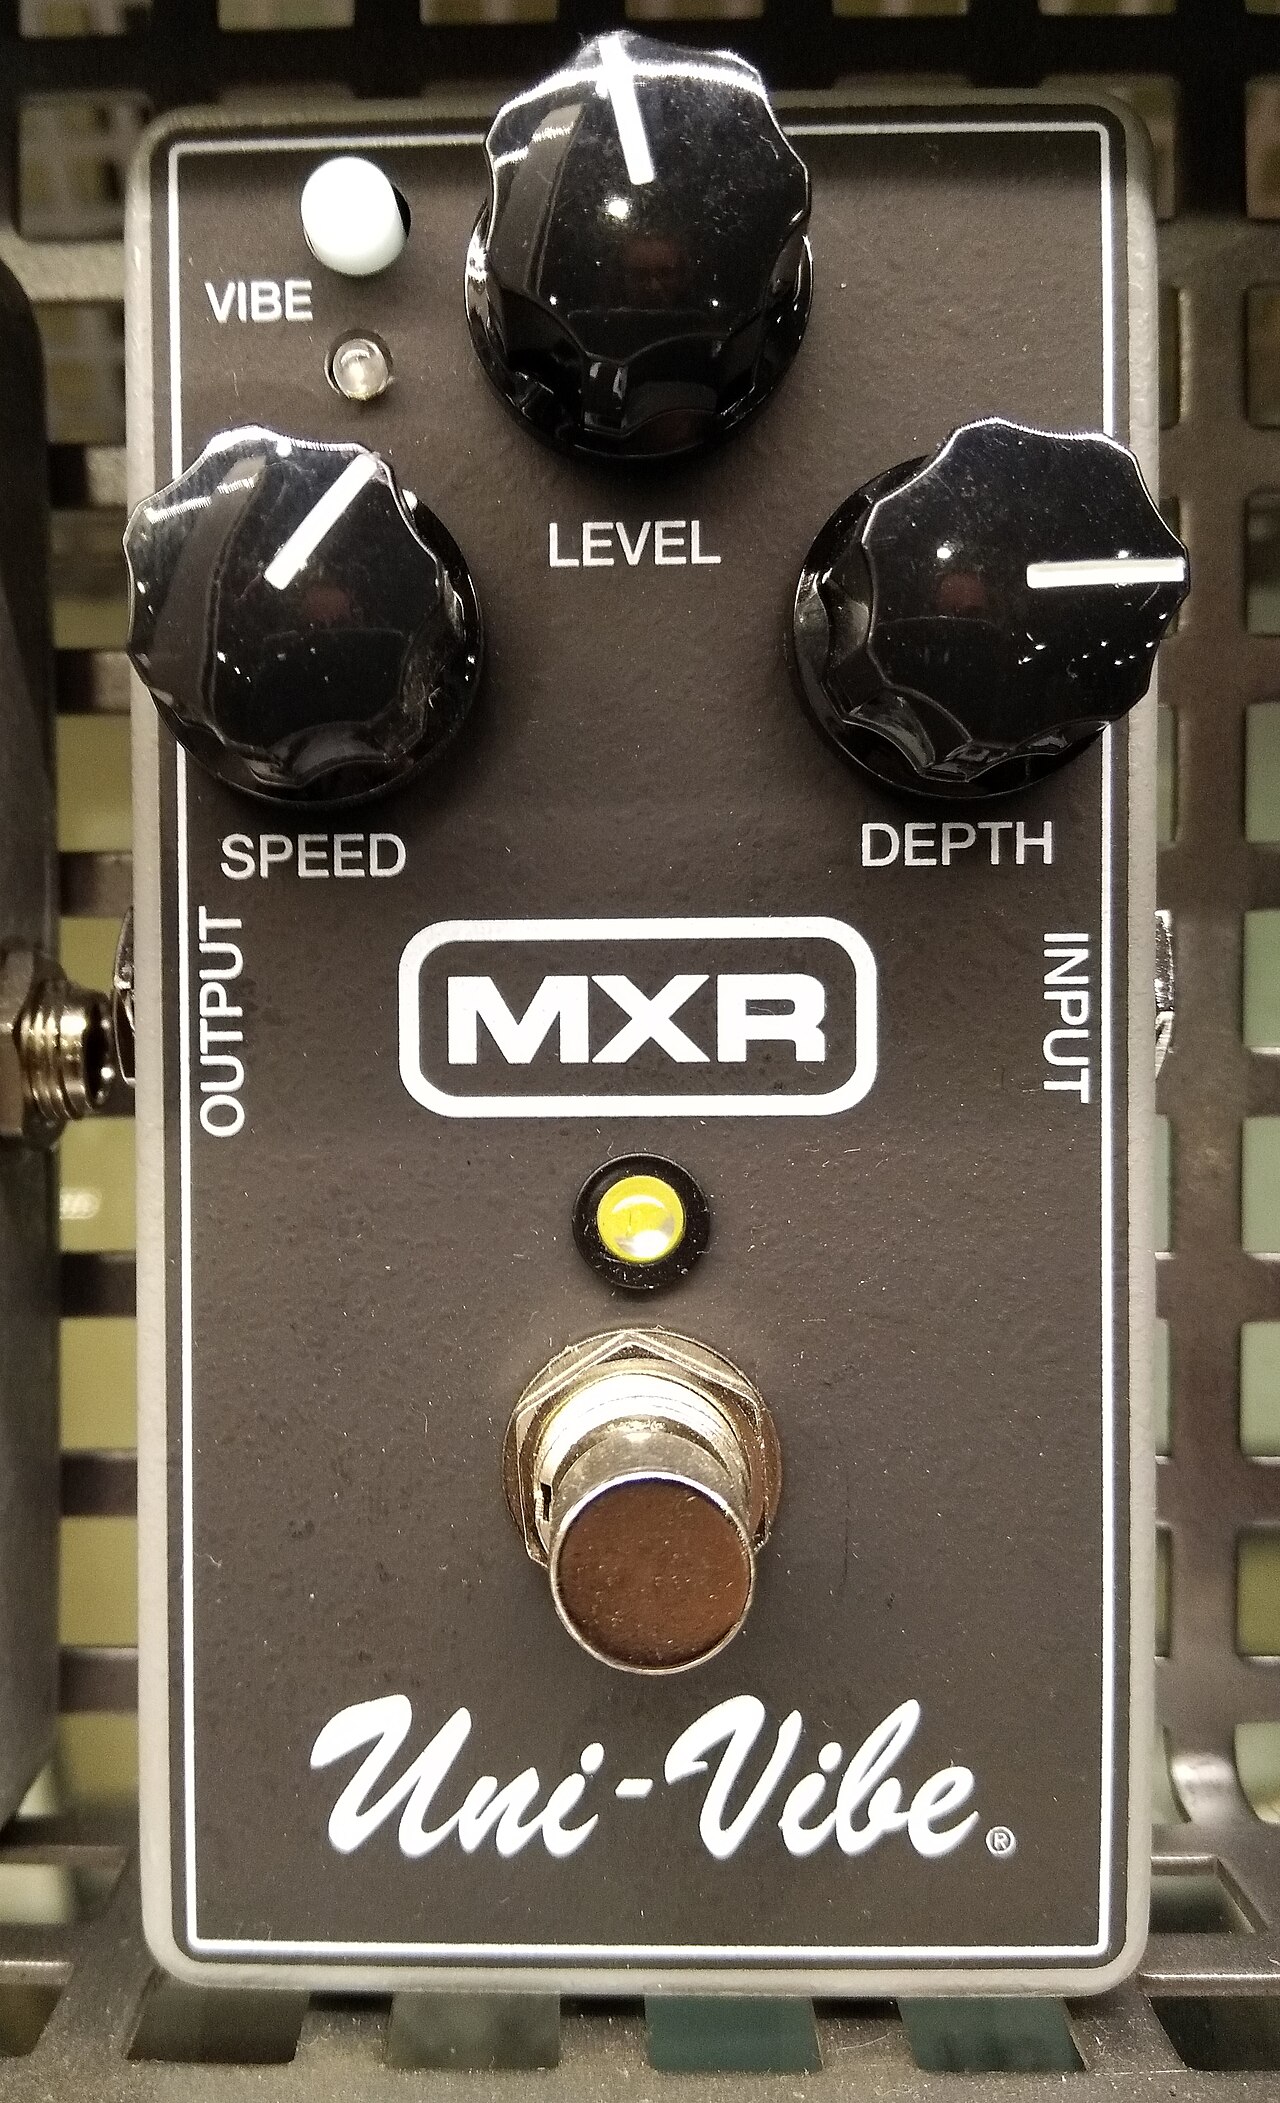
- An MXR Uni-Vibe pedal: Skimel, Wikimedia Commons, CC BY-SA 4.0.
- John Frusciante: Hel Davies, Wikimedia Commons, CC BY-SA 2.0.
- Top image: Mike Bland’s MXR M133 Micro Amp, pictured in his true-bypass modification article; whether this photograph was taken before or after the modification is unspecified. micro-amp-tb-00.jpg, Copyright 2013 Mike Bland, licensed under CC BY 4.0. No changes to the photograph.
- Albert Hammond Jr.: Eric Farias, Wikimedia Commons, CC BY 2.0.
Latest News
Related
On This Day
Monday 9 November
From this week: